Internet connectivity in an integral part of various micro-controller projects, specifically those using the atmega328p with arduino ide/avr-gcc. NRF24l01 modules provide an inexpensive and reliable wireless link. In many projects, an additional avr/arduino is hooked up to a computer with internet connection for linking the projects to the internet. Here i will summarize my experience with raspberry pi as an internet gateway for various projects which uses nrf24l01 to wirelessly transfer data.
 |
| A simple shield for nrf24l01 and ir receiver |
 |
| Connector for GPIO pins on PI |
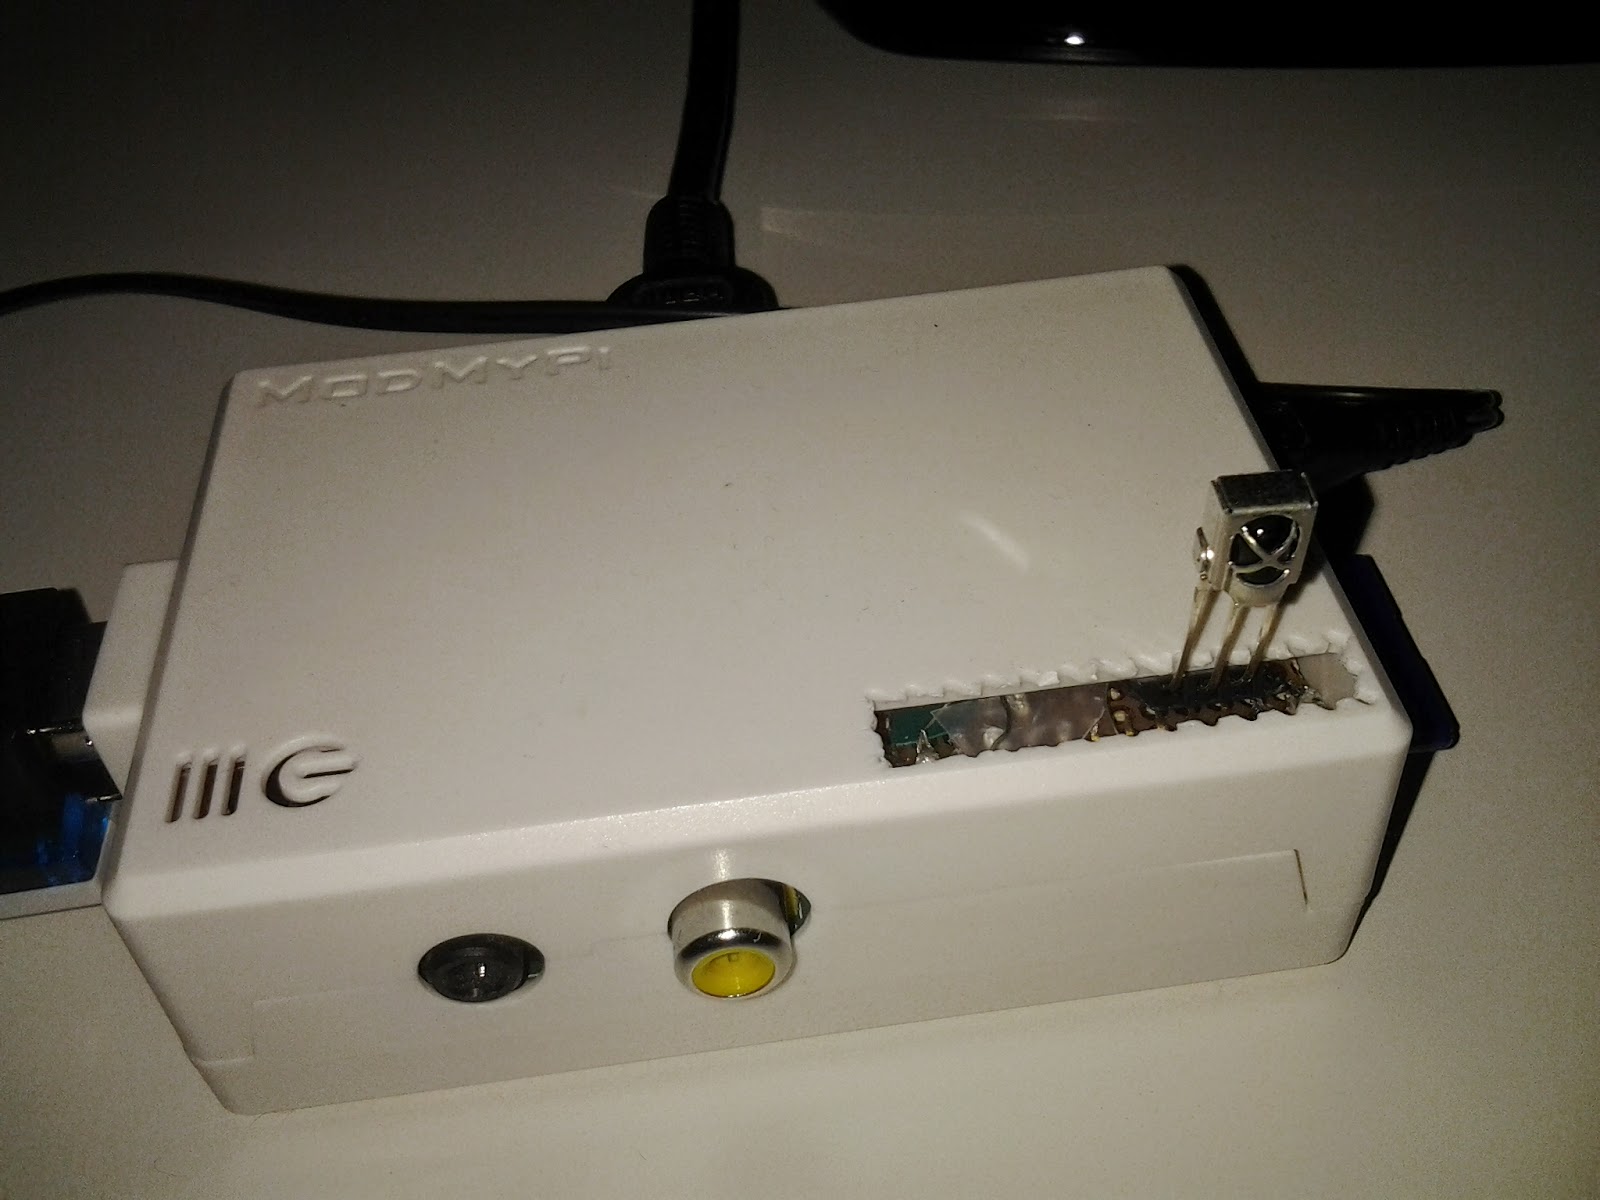 |
| Modmypi case with nrf shield and an ir receiver for raspbmc |
Nrfmodule is directly attached to the raspberry pi GPIO (see figure). The connections are the same as in my previous post (Testing an nrf24l01 module with raspberry pi). For a cleaner solution, i am using a small piece of general purpose pcb and a pair of connectors to mount the nrf module directly over the Pi. The whole setting is running in a raspberry pi with raspbmc, a port of xbmc (now osmc). Raspberry pi is kept on all the time ( as the power consumption is very low) and can collect the sensor data from various devices and hence can be updated online.
Arduino part of the projects are wired in the same manner as in my previous post on nrf24l01 with arduino. (see here for quickly hooking up the module and testing the pin connections)
The key idea of this projects were to
- Keep everything compact and keep the raspberry pi always on as an internet gateway for all sort of home automation/sensor network projects
- Using python (instead of c program) on the raspberry side for flexibility in scripting / playing the strings from sensors and pushing it to various cloud services/ local storage (mysql)
- Send sensor information as small strings for easier handling at the python side.
- Keeping the arduino ends sleeps most of the time for battery operated projects
- keep the installation process faster and reproducible
Python friendly installation of nrf24l01
This was one of the difficult part. I used raspbmc and recent versions has spi support in the kernel. Furthermore, you can use the pi to watch internet streams and media files, making the best use of the setup.Execute the command in sequence as given below to get the module up and running.
1. Getting the tools
 # get the necessary packages
 sudo apt-get install python-dev
 #needed to install the python modules
 sudo apt-get install build-essential
 #install git for easy code access
 sudo apt-get install git-core
2. Installing the modules
git clone https://github.com/riyas-org/nrf24pihub
cd nrf24pihub
cd python-spi
sudo python setup.py install
cd ../RPi.GPIO-0.5.11
sudo python setup.py install
cd ..
Example application : wireless temperature logger DS18S20
Here is a simple example where a ds1820 based temperature sensor will record and wirelessly send the temperature from out side the building to the raspberry pi.The temperature sensor is attached to the digital pin 7 on the arduino. NRF module is connected as described above and on the raspberry pi a python script will be running , which displays the temperature. The example program is located in nrf24pihub folder (raspberryfriend.py)
 |
| DS18S20 connections |
#include <SPI.h>
#include "nRF24L01.h"
#include "RF24.h"
// For using the temperature sensor DS18S20
#include <OneWire.h>
int DS18S20_Pin = 8; //DS18S20 Signal pin on digital 2
OneWire ds(DS18S20_Pin);  // on digital pin 2

//for nrf24 debug
int serial_putc( char c, FILE * )
{
  Serial.write( c );
  return c;
}

//for nrf24 debug
void printf_begin(void)
{
  fdevopen( &serial_putc, 0 );
}

//nRF24 set the pin 9 to CE and 10 to CSN/SS
// Cables are:
//     SS       -> 10
//     MOSI     -> 11
//     MISO     -> 12
//     SCK      -> 13

RF24 radio(9,10);

//we only need a write pipe, but am planning to use it later
const uint64_t pipes[2] = { 0xF0F0F0F0E1LL,0xF0F0F0F0D2LL };

// here we can send up to 30 chars
char SendPayload[31] = "blog.riyas.org";

void setup(void) {
  Serial.begin(57600); //Debug
  printf_begin();
  //nRF24 configurations
  radio.begin();
  radio.setChannel(0x4c);
  radio.setAutoAck(1);
  radio.setRetries(15,15);
  radio.setDataRate(RF24_250KBPS);
  radio.setPayloadSize(32);
  radio.openReadingPipe(1,pipes[0]);
  radio.openWritingPipe(pipes[1]);
  radio.startListening();
  radio.printDetails(); //for Debugging
}

void loop() {

  //Get temperature from sensor
    float temperature = getTemp();
  // Assign temperature to payload, here am sending it as string
  dtostrf(temperature,2,2,SendPayload);

  //add a tag
  strcat(SendPayload, "X");   // add first string

  //send a heartbeat
  radio.stopListening();
  bool ok = radio.write(&SendPayload,strlen(SendPayload));
  radio.startListening();
  //Serial.println(SendPayload);

  // slow down a bit
  delay(1000);
}


// Getting temperature from DS18S20

float getTemp(){
  //returns the temperature from one DS18S20 in DEG Celsius

  byte data[12];
  byte addr[8];

  if ( !ds.search(addr)) {
      //no more sensors on chain, reset search
      ds.reset_search();
      return -1000;
  }

  if ( OneWire::crc8( addr, 7) != addr[7]) {
      Serial.println("CRC is not valid!");
      return -1000;
  }

  if ( addr[0] != 0x10 && addr[0] != 0x28) {
      Serial.print("Device is not recognized");
      return -1000;
  }

  ds.reset();
  ds.select(addr);
  ds.write(0x44,1); // start conversion, with parasite power on at the end

  byte present = ds.reset();
  ds.select(addr);
  ds.write(0xBE); // Read Scratchpad


  for (int i = 0; i < 9; i++) { // we need 9 bytes
    data[i] = ds.read();
  }

  ds.reset_search();

  byte MSB = data[1];
  byte LSB = data[0];

  float tempRead = ((MSB << 8) | LSB); //using two's compliment
  float TemperatureSum = tempRead / 16;

  return TemperatureSum;

}
Raspberry pi code (it is already downloaded from github when you installed the modules). You can see it here
So on the raspberry pi execute it with sudo ( soo as to access the spi device)
sudo python raspberryfriend.py
You can place multiple sensors at different places and use different string suffix/ prefix to identify them and then use python to process them further
Here is a snapshot after keeping the sensor in a refrigerator (it is still cooling down from room temperature)
 |
| Sensor reading from refrigerator (while cooling down) |
An alternate solution for remote temperature monitoring based on a pair of arduinos and 433mhz rf link can be seen in previous article here
Sending multiple sensor values to the Raspberry pi nrf24l01 hub and storing it in a csv file
It is easy to send multiple sensor values by packing it in the 32 bytes space (for simple values). Here i modified the script a little bit by adding some tags (for eg T or P) to indicate the payload.
Eg NODE1T23.45TP45PH34H where value between P is pressure, T is temperature and so on
You can download the sketch from github
At the raspberry pi end, a modified python script is used to write the values in to a csv file with date and time followed by sensor values.
In case of multiple nodes, it is wise to add a node specific Payload and process accordingly.
For a better and easy maintenance, it would be easier to use a mysql database. Also take care of the SD card , if you plan to keep it running for longer duration's (as the attached script writes each values as soon as received to SD)
You may see the simple receiver code for the Raspberry pi at here
A compatible arduino sketch for dht sensor can be downloaded here
A compatible arduino sketch for dht sensor can be downloaded here
Newer Models of the Pi (B+) with 40 pins
With new models of raspberry pi with 40 pins, it appears that the first 26 pins remains similar and hence if you count the pins correctly, there wont be any issue in getting this codes up and running. see more on pin layout and comparisons from a nice article in raspi.tv and an other excellent article in elinux
 |
| Pin layout on the pi (identical zones are shown with a dotted red line) |